Carry Techniques and Optimization, Holster Gear, IWB Holster Wedge
IWB Concealment Tips: Easy Wins for Hidden Comfort
IWB concealment tips often focus on gear alone, but the real wins come from how you position, dress, and adjust your setup. At Cloudster Pillow, we’ve seen carriers transform their comfort and concealment by mastering a few simple fundamentals.
Most people overlook the small modifications that make the biggest difference. Your waistband position, clothing choices, and minor adjustments can eliminate printing and discomfort without buying new gear.
Where Your Holster Sits on Your Waistband
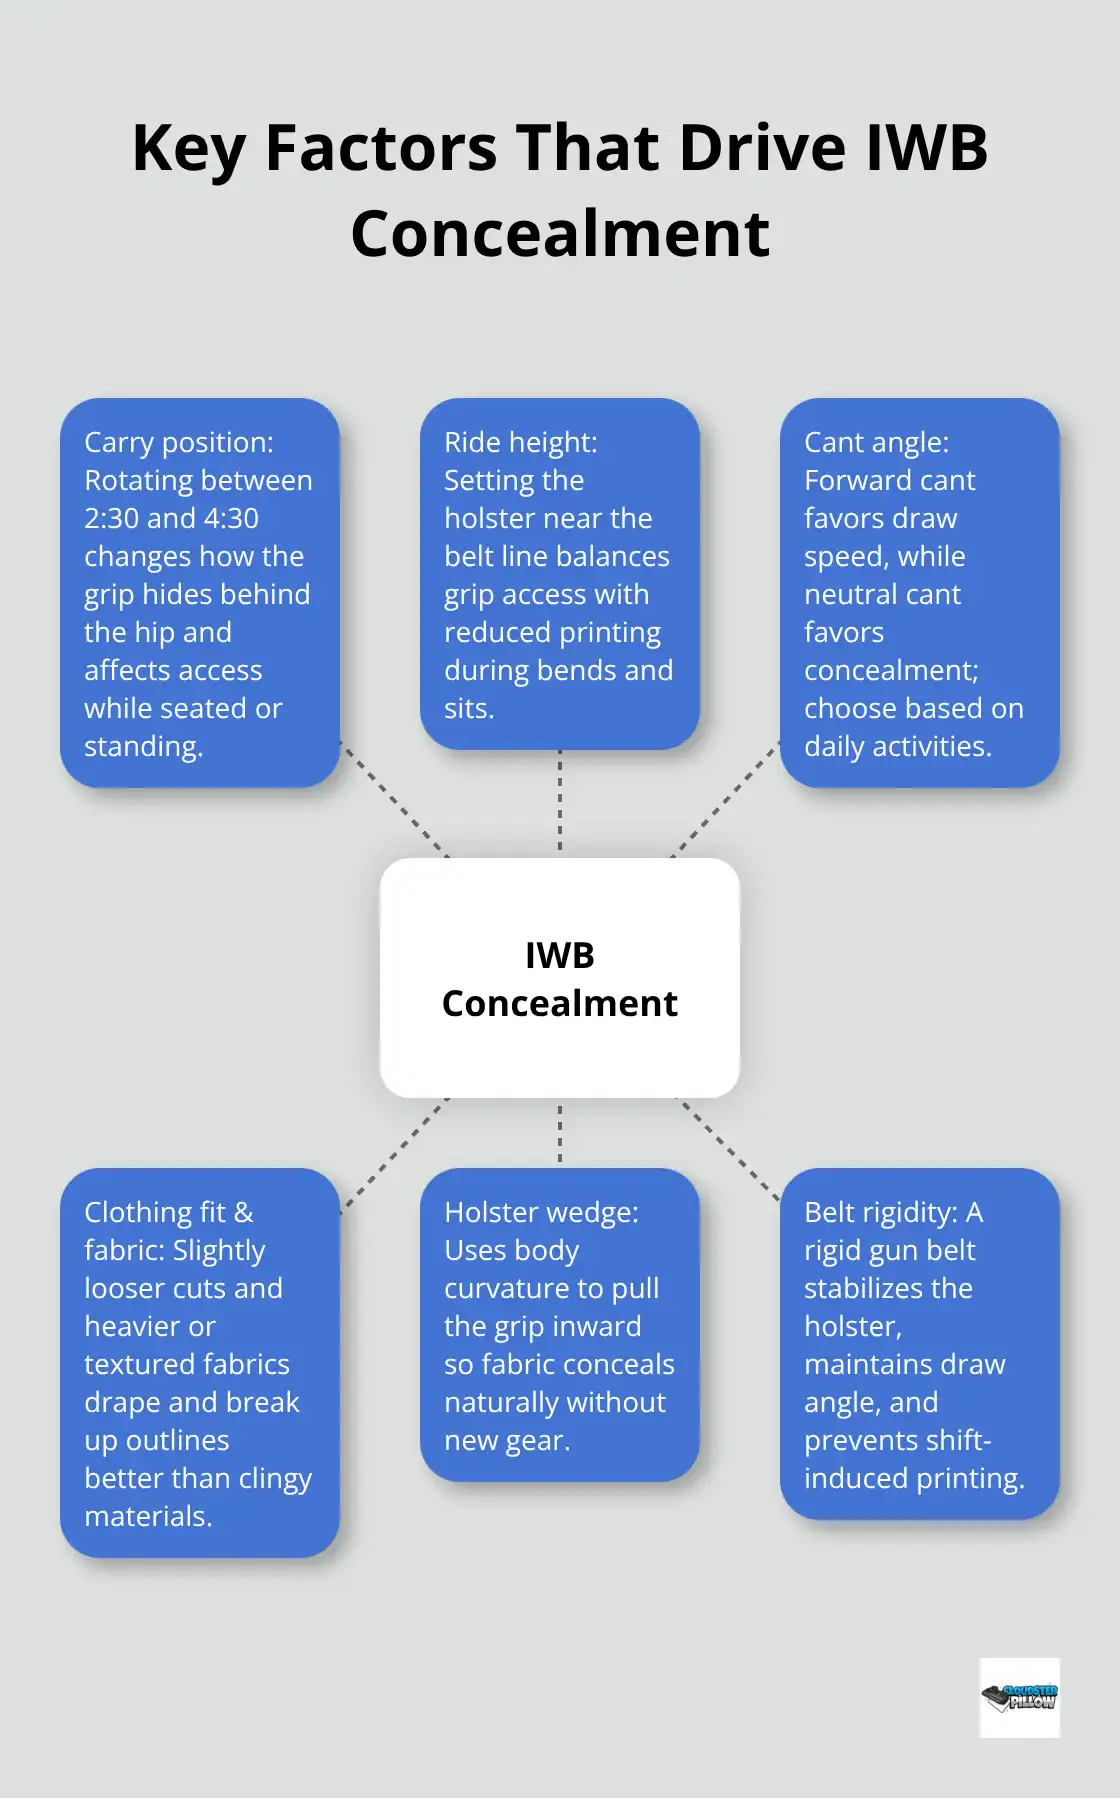
Your carry position determines everything that follows. The 3 to 4 o’clock position works for most IWB carriers because it balances concealment with accessibility, but this isn’t universal. Ride height matters more than position alone. If your holster sits too high, the grip prints immediately when you bend or sit. Too low, and you lose retention security and struggle to achieve a full firing grip during the draw. Most carriers find their sweet spot between the belt line and roughly one inch below it.
Test Your Position Over Several Days
Adjust your holster’s ride height over several days of actual carry, not just standing in your living room. Pay attention during activities where printing happens most: sitting in a car, reaching for items on shelves, or leaning against counters. Your body type influences this significantly. Larger frames often benefit from slightly higher ride heights because the grip has more space to hide naturally. Smaller frames typically need lower positions to keep the grip tucked behind the hip. Clothing style changes everything too. Untucked shirts with heavier fabric give you freedom to ride higher without printing. Fitted clothing demands a lower position and careful ride height management.
Find Your Optimal Position Through Rotation
Start at 3 o’clock and carry for a full day, noting when and where you see printing. Move the holster one position clockwise every few days-3:30, 4:00, 4:30-and repeat. Most people discover their optimal position falls somewhere between 2:30 and 4:30 o’clock, though appendix carry at 1 o’clock offers faster access from seated positions if you accept increased printing challenges.
Adjust Your Cant Angle for Your Needs
Cant angle (the forward tilt of your holster) compounds these variables. A forward cant improves draw speed, while a neutral cant prioritizes concealment.
Your clothing and body mechanics during actual activities should guide this choice, not theory. Once you’ve identified your position and ride height, accessories like holster wedges become far more effective because they work with your geometry rather than against it. This foundation sets you up to tackle the next critical element: what you wear over your holster.
Clothing Choices That Maximize IWB Concealment
Your clothing serves as your first line of defense against printing, and most carriers overthink fabric weight while ignoring fit and cut. The real strategy starts with shirt length. Your shirt needs to extend at least two inches below your belt when standing naturally. Many carriers wear shirts that hit exactly at the hip, which means any movement-reaching, bending, sitting-exposes the holster outline immediately. Test this in your car, the environment where printing happens most during daily carry.
Select Fabrics and Cuts That Work
Heavier materials like cotton blends or structured fabrics work best because they drape away from your body rather than clinging to the holster’s shape. Lightweight athletic fabrics and moisture-wicking materials tend to mold directly to your firearm’s profile, creating visible bumps even under longer shirts. Prioritize cut over brand when shopping. A well-fitted shirt that’s slightly loose through the torso outperforms expensive premium brands cut tight. Dark colors help break up visual patterns, but fabric texture matters equally. Smooth, tightly woven materials reflect light differently than loose weaves, which scatter it and reduce the contrast that makes printing obvious.
Layer With Intention, Not Bulk
Layering deserves specific attention because most carriers layer incorrectly. Adding a second shirt directly over your holster sometimes worsens printing by creating additional bulk that conforms to the gun’s shape. Instead, wear a fitted undershirt against your skin, then your concealment shirt loose over it, then add an outer layer like a jacket or overshirt that sits even looser.
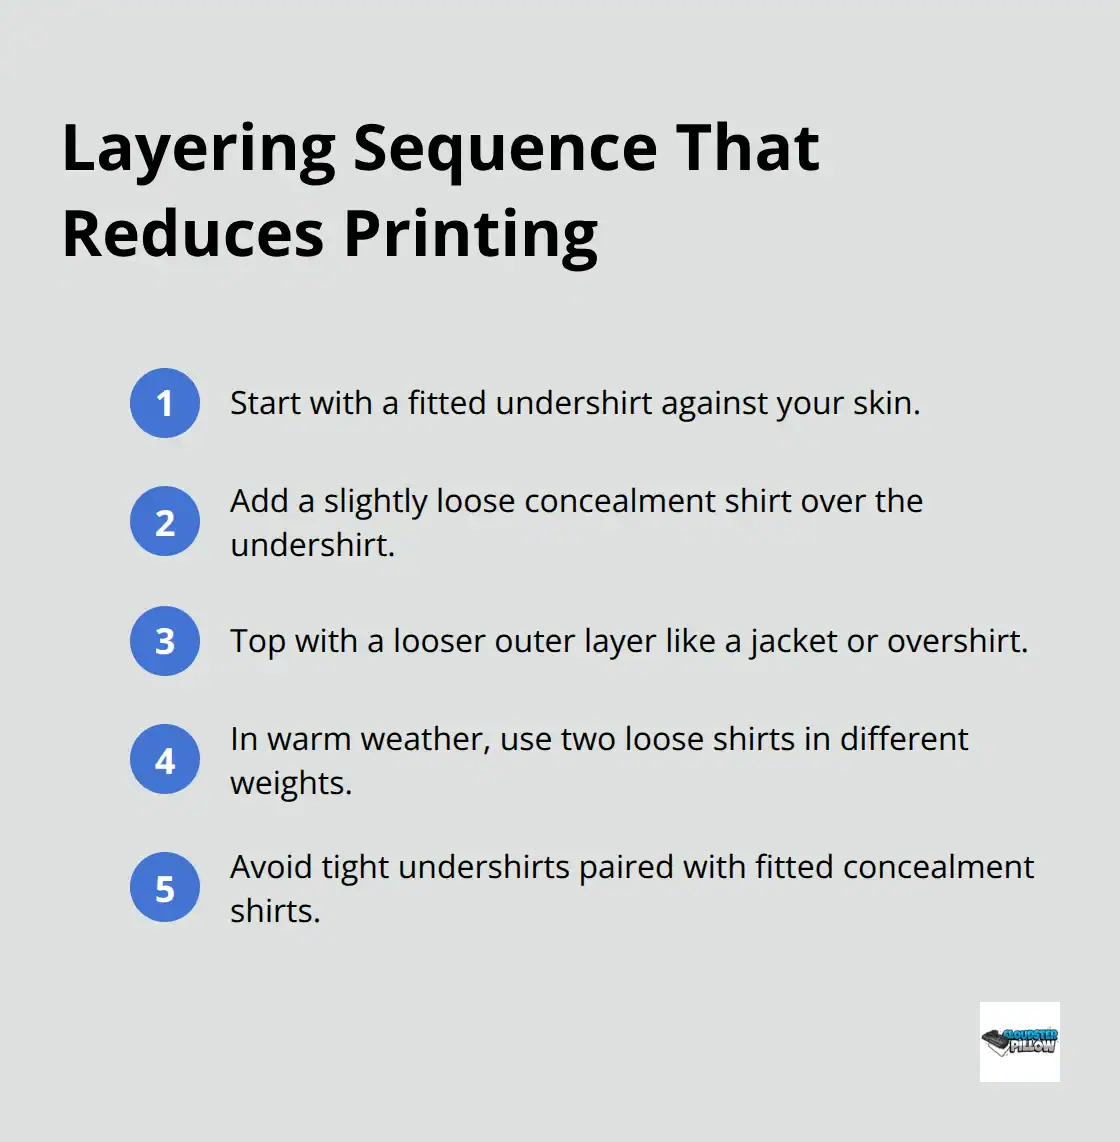
This creates distance between the holster and your outer garment, allowing fabric to fall naturally rather than trace the firearm’s outline. In warm weather when jackets aren’t practical, two loose-fitting shirts in different weights achieve similar results. Avoid tight-fitting undershirts paired with fitted concealment shirts-this combination eliminates the air gap that prevents molding.
Invest in Your Foundation Gear
For everyday carry, rotate between at least three different shirts to identify which cuts and fabrics work best with your specific holster position and body type. Your belt matters equally; a rigid gun belt keeps your holster stable and prevents the shifting that causes printing during movement. A quality gun belt distributes weight evenly and maintains a consistent draw angle, eliminating a major source of concealment failure that clothing alone cannot fix. Accessories like holster wedges address printing that persists despite proper positioning and clothing choices, pushing the holster grip closer to your body where fabric naturally conceals it better. These modifications work together to create a concealment system that functions across different activities and environments.
Comfort Modifications Without Replacing Your Holster
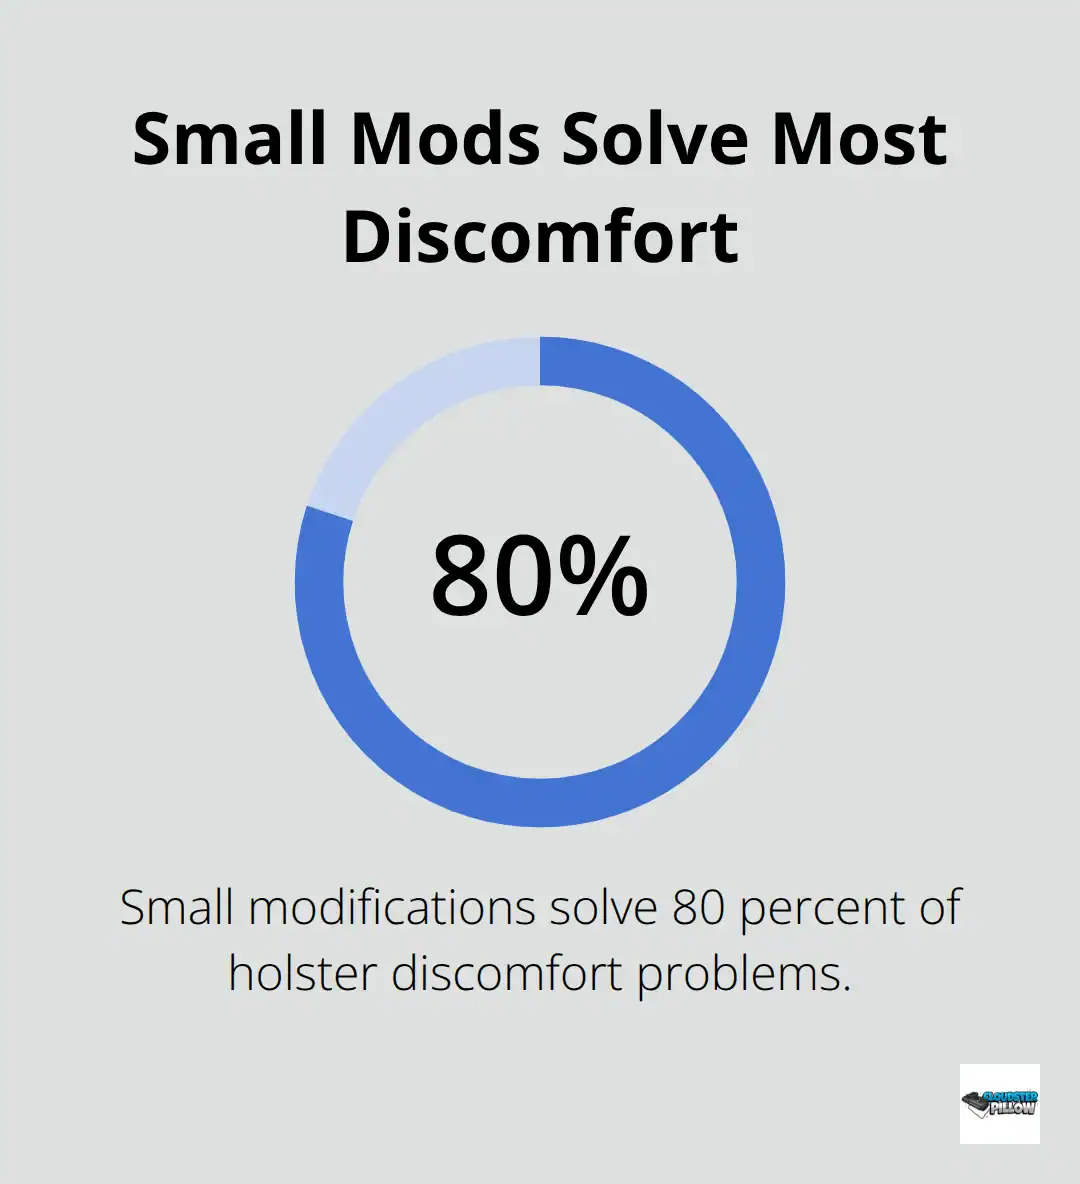
Most carriers assume they need to replace their holster when discomfort strikes, but the reality is that small modifications solve 80 percent of these problems. Holster wedges address printing that positioning and clothing alone cannot fix by pushing the grip closer to your body where natural fabric concealment works better. A wedge attached to the back of your holster uses your body’s natural curve to angle the grip inward, reducing the outward bulge that creates visible outlines. Wedges weigh roughly 0.2 ounces and use flexible closed-cell foam resistant to sweat, humidity, and UV damage, making them practical for all-day wear across seasons. The key is placement: position the wedge on the grip side if only the grip prints, or experiment with placement along the holster’s back to conceal different sections depending on your firearm’s profile and attachment accessories.
If you carry a pistol with a mounted light or optic, the wedge on the grip side pulls the slide toward your torso while the accessories stay concealed naturally. Testing wedge position takes two or three days of actual carry before you notice meaningful concealment improvements, so avoid adjusting too frequently and allow each placement time to work.
Adjusting Your Cant Without Buying New Equipment
Cant angle changes your draw speed and concealment without requiring new gear, but most carriers get this wrong by adjusting based on theory instead of real-world testing. Forward cant improves seated draws significantly because the grip angles forward naturally as you bend, but it increases printing when standing still. A neutral cant prioritizes standing concealment at the cost of slightly slower seated access. Your specific daily activities should determine this choice, not general recommendations. Spend one week at each cant angle during your normal routine, paying attention during your most common activities: sitting in your car, standing at work, or reaching overhead. Document where printing appears at each angle, then choose the cant that minimizes printing during activities you perform most frequently. If you alternate between heavy driving and office work, forward cant usually wins because seated position dominates your day. If you spend most time standing or moving, neutral cant performs better. Some carriers use adjustable holster clips that allow quick cant changes without tools, letting you rotate between two preferred angles depending on your daily schedule.
Breaking In Your Setup for Consistent Comfort
Your holster and wedge combination needs a proper break-in period that goes beyond simply wearing it. For the first week, carry during low-stress activities like grocery shopping or running errands rather than your most demanding environment. This allows your holster to conform slightly to your body shape and for you to identify any pressure points before they become problems. Pay attention to how the holster feels against your skin during movement, sitting, and standing, then make small adjustments to ride height or cant if specific activities cause discomfort. Most carriers report that a properly positioned holster with a wedge feels comfortable within 7 to 10 days of consistent carry. If discomfort persists beyond two weeks despite adjustments, the issue likely stems from holster fit or your carry position rather than break-in time. Rotating between two different holsters occasionally prevents pressure point fatigue from repeated contact in the same spot, extending comfort during extended carry days. A quality holster wedge allows you to transform your existing setup without the expense and hassle of replacing your entire holster system.
Final Thoughts
The best IWB concealment tips work because they address your specific body, clothing, and daily activities rather than forcing you into generic recommendations. You’ve tested your waistband position, selected fabrics that drape naturally, and discovered how small modifications eliminate printing without replacing your entire setup. Most carriers see real improvements within days by adjusting ride height, testing cant angles, and positioning a quality wedge to push the grip closer to your body where natural fabric concealment works best.
Comfort and concealment connect directly to your practice habits and situational awareness. When your holster sits right, your clothing fits properly, and your wedge positions the grip correctly, carrying feels natural instead of forced. Comfortable carriers practice more consistently, maintain better awareness, and develop reliable muscle memory because they stop adjusting their setup constantly throughout the day.
Your personal carry solution exists in the combinations you test methodically. Start with one adjustment this week and evaluate it for several days during your normal routine before adding another change. Visit Cloudster Pillow’s holster wedge collection to find the right solution for transforming your carry system.
Frequently Asked Questions: IWB Concealment Tips
What is the best position for IWB concealed carry?
The 3 to 4 o’clock position works best for most IWB carriers because it balances concealment with draw accessibility. Start at 3 o’clock and test for a full day, moving clockwise every few days until printing disappears. Your optimal position depends on your body type, clothing, and daily activities.
How do I stop my IWB holster from printing?
Adjust your ride height first — the sweet spot is between your beltline and one inch below it. Then add a holster wedge to tilt the grip toward your body. Most printing problems are solved with these two adjustments. For a detailed walkthrough, see our complete holster wedge guide.
What clothing works best for IWB concealed carry?
Choose shirts that extend at least two inches below your belt, made from heavier cotton blends or structured fabrics that drape away from your body. Avoid tight athletic materials that cling to the holster’s shape. A slightly loose torso fit outperforms expensive brands cut too tight.
Do I need to buy a new holster to fix discomfort?
In most cases, no. Small adjustments to ride height, cant angle, and adding a foam holster wedge solve about 80% of IWB discomfort issues. Replacing the entire holster system is rarely necessary unless the holster itself doesn’t fit your firearm properly.