AIWB Holster Wedge, Articles and Blogs
AIWB Positioning Comfort Tips: Getting the Setup Right
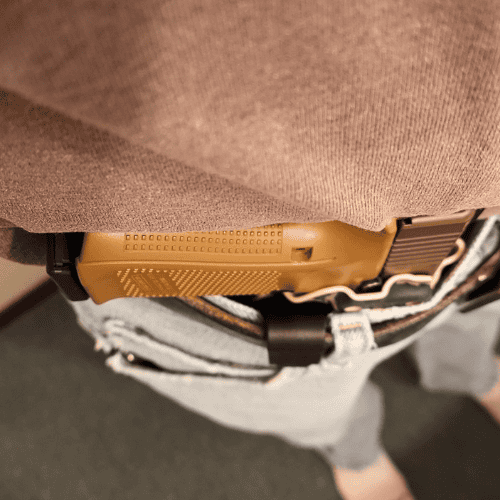
Appendix carry works great-until it doesn’t. A poorly positioned holster can turn your daily carry into an uncomfortable experience, with printing, pressure points, and accessibility issues that make you want to ditch your gun altogether.
We at Cloudster Pillow know that AIWB positioning comfort tips aren’t just nice-to-have details. They’re the difference between carrying confidently all day and constantly adjusting your setup. This guide walks you through the fundamentals, common problems, and practical solutions to get your appendix carry right.
Getting Your Appendix Holster Position Right
Appendix carry works because it’s fast to access, sits naturally in your hand, and keeps the gun tight to your body for concealment. The tradeoff is that any misalignment creates immediate discomfort-your body sends constant signals when something presses wrong. Cant (the angle of your holster) and ride height (how high the gun sits on your waistline) control whether appendix carry feels natural or painful. Most carriers find their sweet spot around 12:30 to 1 o’clock, but your exact position depends on your frame, your gun’s size, and how your clothing drapes. A compact gun on a lean frame sits differently than a full-size pistol on someone with more mass, so there’s no universal answer-only what works for you.
Cant Angle Sets Your Comfort Foundation
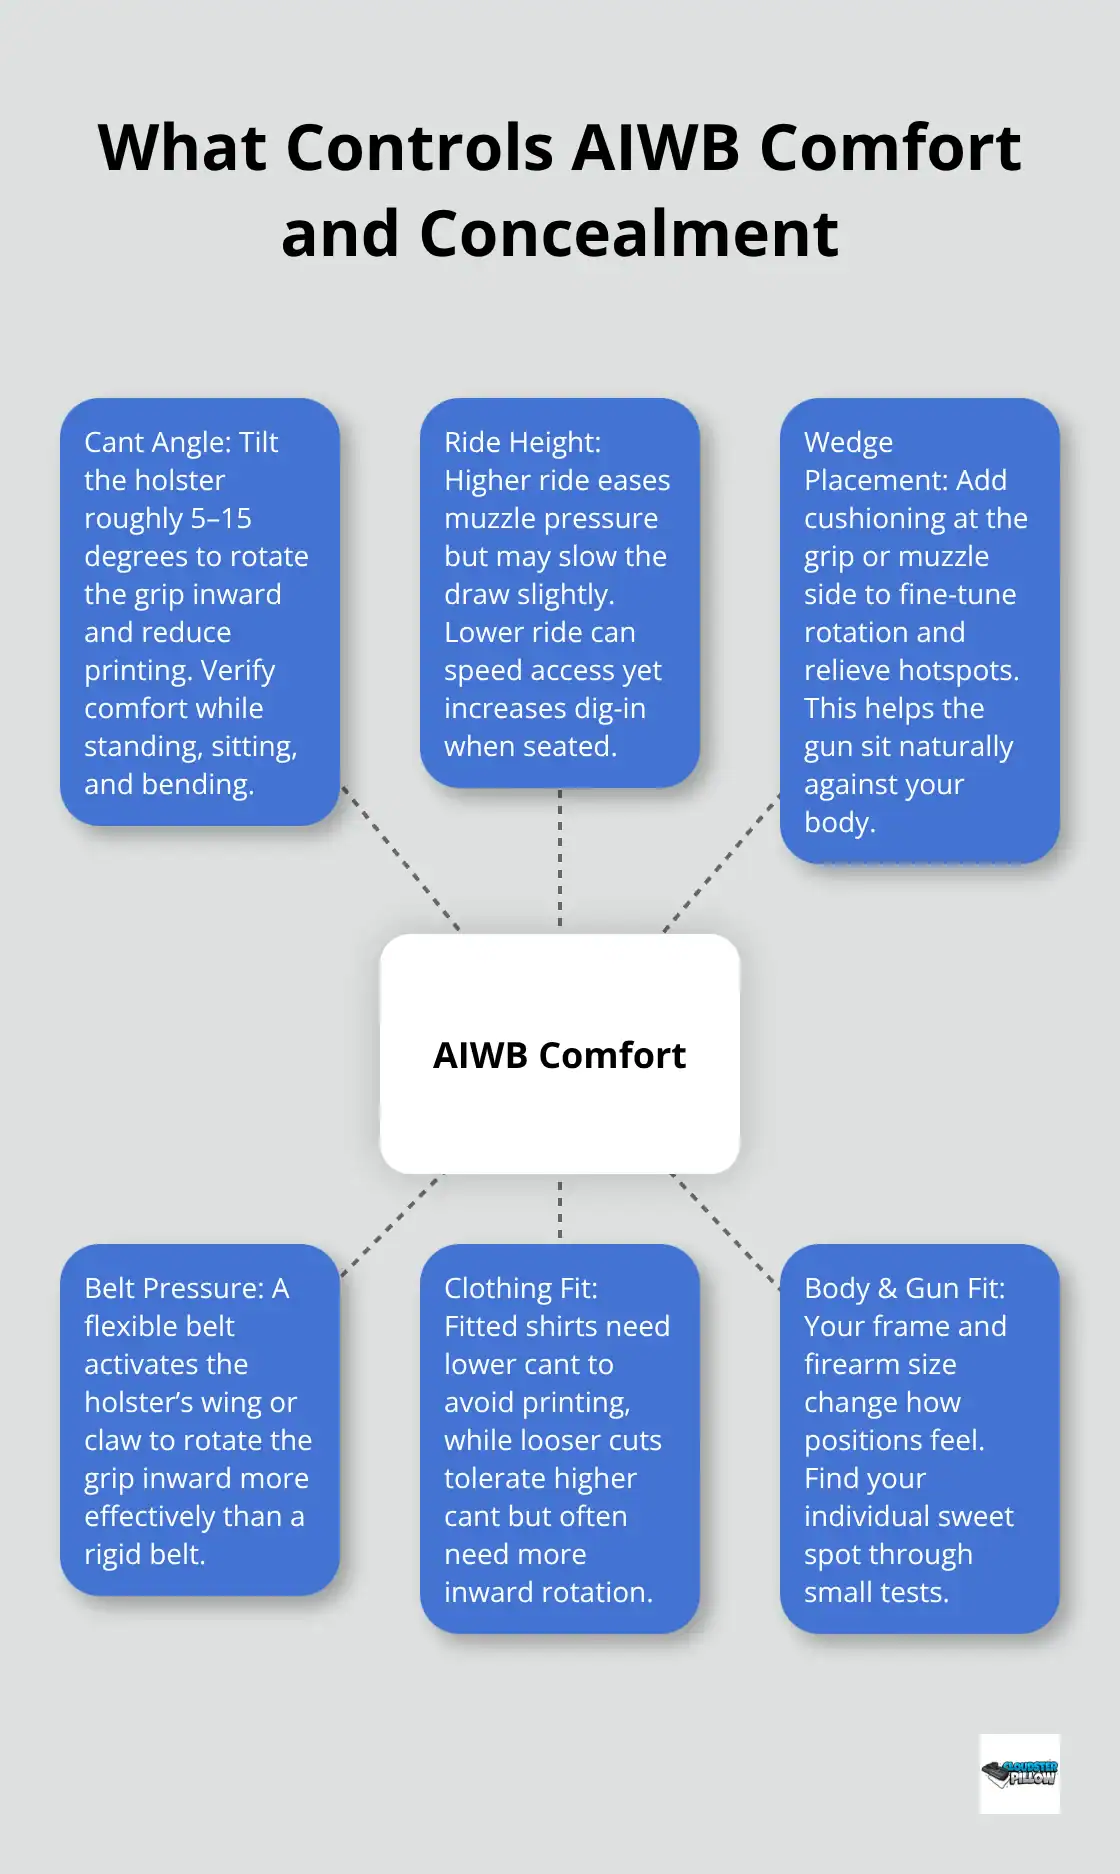
Cant is the forward or backward tilt of your holster. A slight forward cant (5 to 15 degrees) naturally angles the grip inward toward your body, which reduces printing and makes the gun feel more secure against your torso. Too much cant pushes the grip outward and creates a printing bulge; too little cant leaves the grip standing away from your body. Start at around 10 degrees and test while sitting, standing, and bending. Sitting is the real test-appendix carry pressure changes dramatically when you bend at the waist, so a position that feels fine standing can become painful in a chair. Adjust cant in small increments until the grip stays flat against your body throughout normal movement.
Your clothing also influences optimal cant. Looser shirts tolerate higher cant angles, while fitted clothing demands lower cant to avoid printing. The goal is a cant angle where the grip disappears under your shirt without constant adjustment.
Ride Height Controls Pressure Points
Ride height determines how high your holster sits relative to your waistline. A higher ride reduces muzzle pressure against your thighs and lower abdomen, which is why many carriers prefer it for all-day wear. A lower ride brings the gun closer to your centerline for slightly faster access but increases muzzle dig when you sit. Try positioning your ride height around the natural crease where your hip meets your leg-this position typically balances access and comfort.
If you feel pressure in your lap when seated, raise your holster an inch and test again. If your draw feels slow or your grip sits too high, lower it slightly. Women and carriers with smaller frames should pay special attention here because higher ride heights often solve both comfort and concealment problems simultaneously.
Amplify Your Adjustments with the Right Wedge
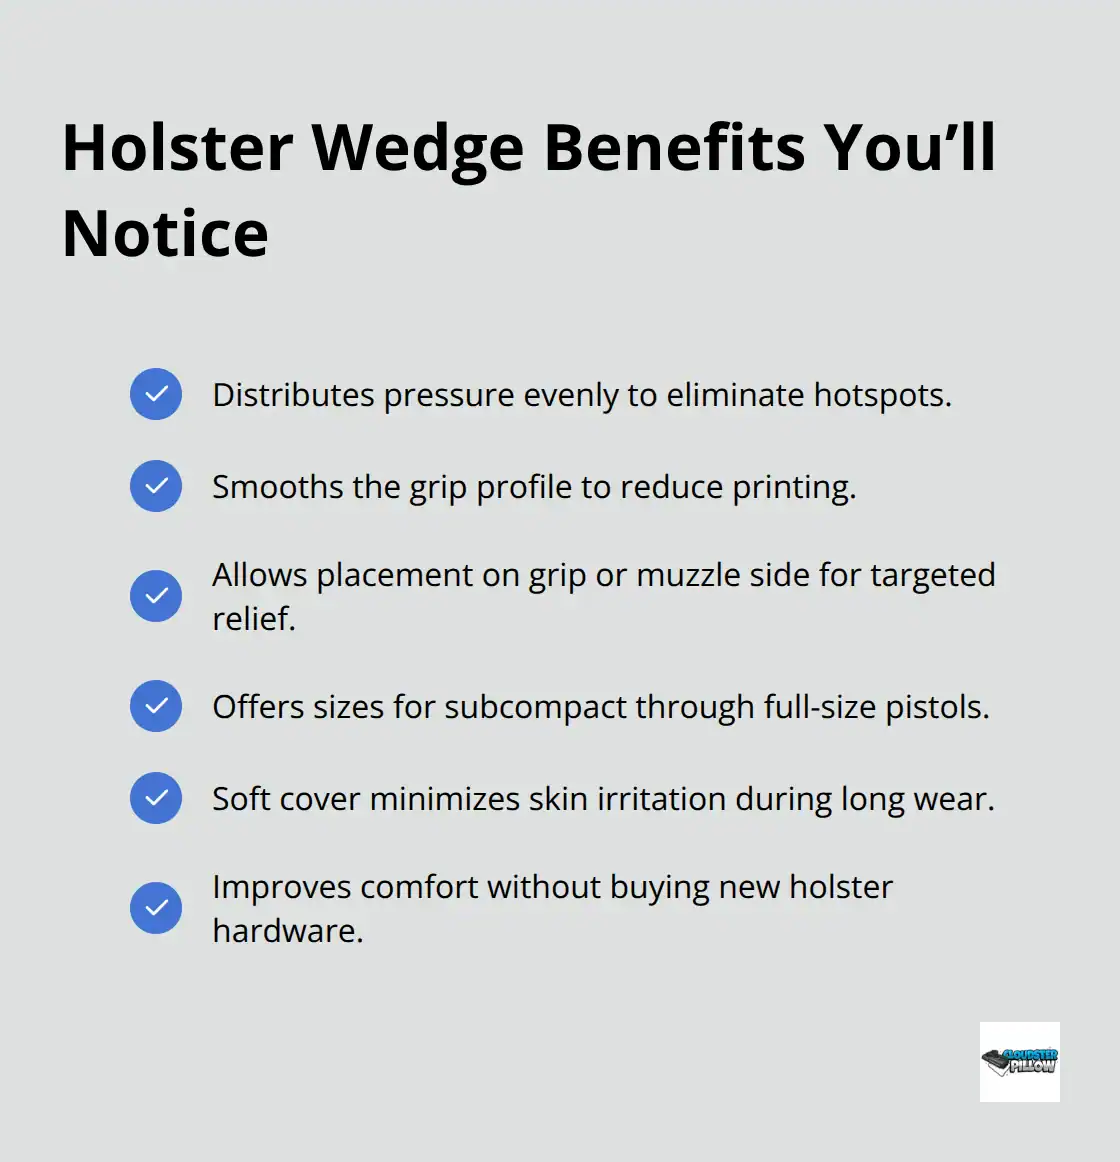
Small positioning tweaks become more effective when you add proper cushioning to your setup. A holster wedge amplifies these adjustments by cushioning contact points and smoothing the grip profile, making fine-tuning work without requiring new hardware. The right wedge transforms how your existing holster performs, turning minor discomfort into all-day wearability.
With cant and ride height dialed in, you’re ready to address the specific comfort issues that most appendix carriers face.
Fixing the Three Most Common AIWB Problems
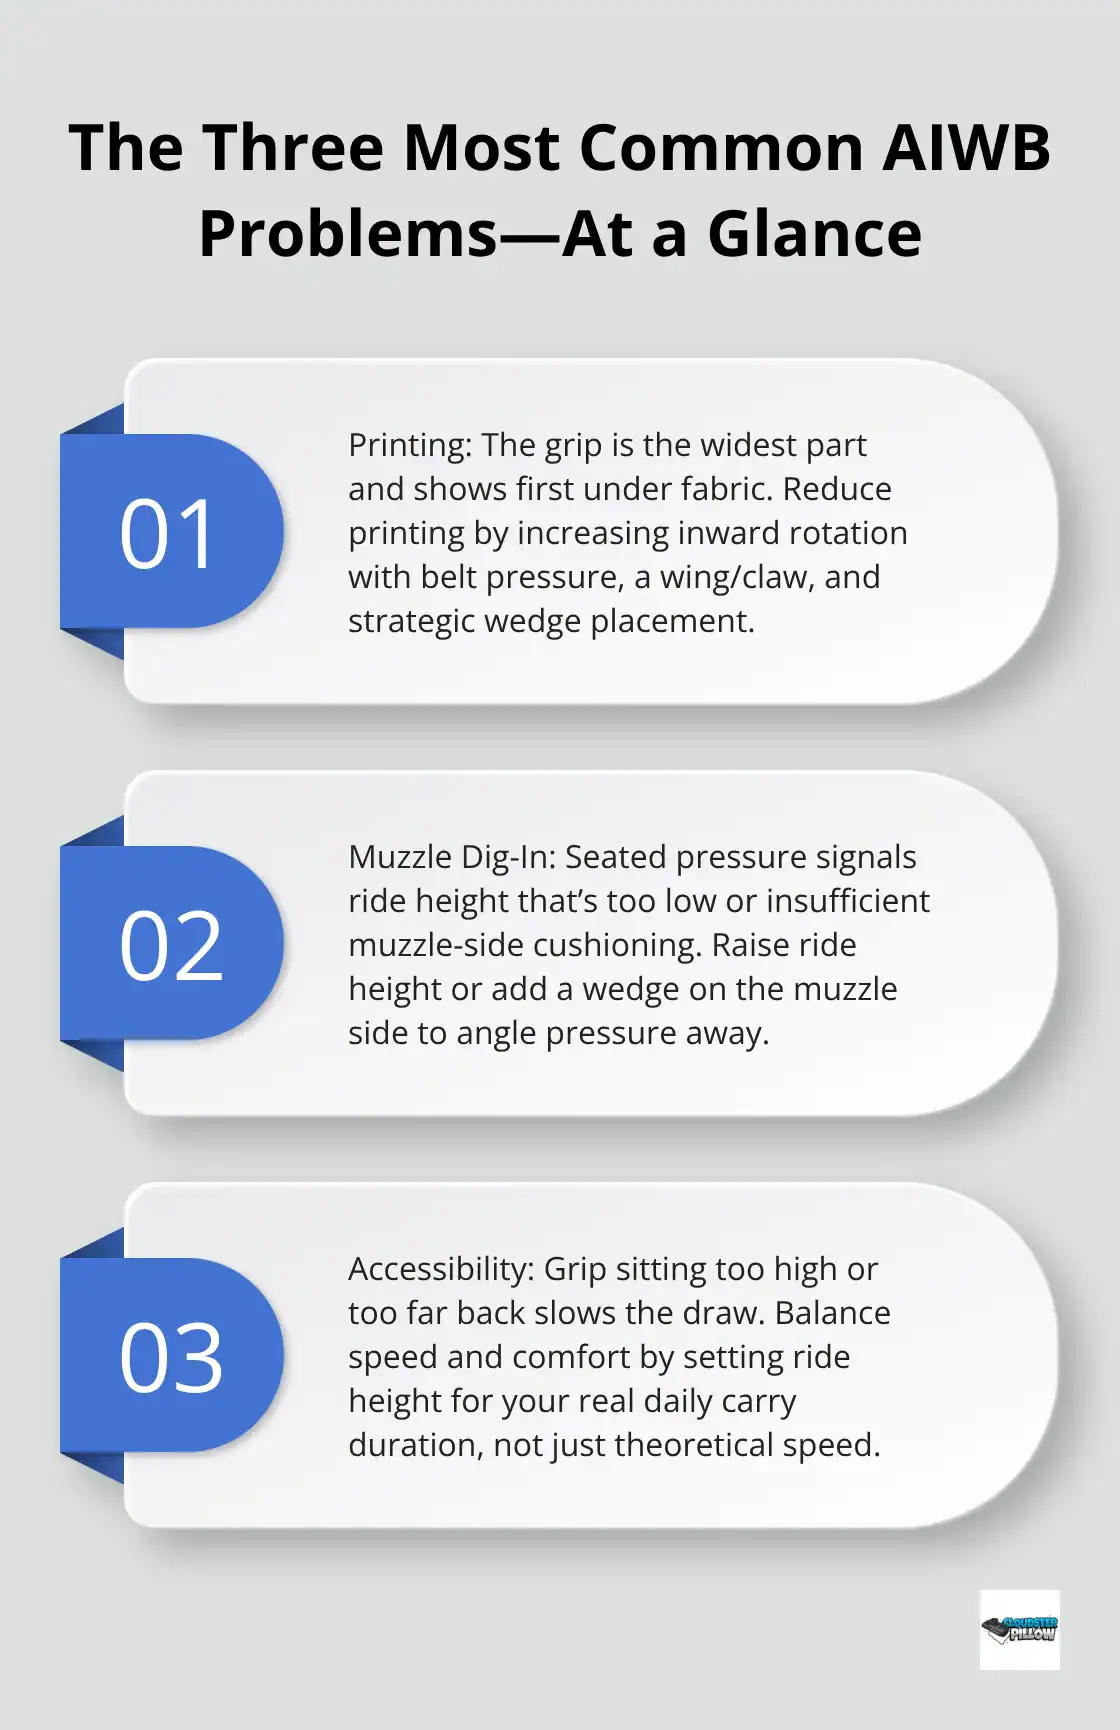
Printing happens because your grip outline shows through fabric, and it’s the fastest way to lose confidence in your setup. The grip is the widest part of your gun, so it prints first and most obviously. Muzzle pressure creates dig-in and hotspots when the barrel presses into your abdomen or thigh during sitting or bending. Accessibility suffers when cant or ride height positions your grip too high, too far back, or at an angle that slows your draw. These three problems overlap-fixing one often improves the others.
The key is diagnosing which problem dominates your discomfort, then applying targeted fixes instead of swapping holsters randomly.
Diagnose Your Printing with the Poke and Check Method
The Poke and Check method reveals exactly where your gun shows through fabric. Palpate your shirt where you suspect printing and mark the exact location. Is the printing at your grip, your muzzle, or both? This simple step tells you which adjustment to make next, saving you time and frustration.
Grip Printing Requires Inward Rotation
Grip printing means your holster needs more inward rotation, which comes from belt pressure and a proper wing or claw on your holster. Tighten your belt first-most carriers underestimate how much pressure activates a wing. If tightening the belt doesn’t rotate the grip inward enough, a holster wedge brings the grip closer to your body by cushioning and angling the contact points. Medical-grade materials combined with a tapered profile reduces both printing and the pressure points that cause discomfort during extended wear.
Muzzle Printing and Dig-In Need Different Solutions
Muzzle printing requires a different approach: raise your ride height or add a wedge on the muzzle side to push it away from your body. Test these changes while seated because that’s where muzzle pressure becomes most obvious. A wedge positioned on the muzzle side (rather than the grip side) angles the barrel away from your abdomen and thighs, eliminating the dig-in that makes sitting painful.
Accessibility Depends on Your Carry Lifestyle
For accessibility, check whether your grip sits too high relative to your hand position. A higher ride slows your draw slightly but improves comfort for all-day carry-a worthwhile tradeoff for most CCW carriers. Lower ride heights work for shorter sessions or when you prioritize speed over comfort, but they create dig-in during desk work or driving. Choose based on your actual carry duration and lifestyle, not theoretical draw speed.
Once you’ve addressed printing, pressure, and accessibility, your setup becomes stable enough to fine-tune with the right accessories and clothing choices.
The Accessories That Actually Solve AIWB Discomfort
A properly positioned holster only gets you halfway to all-day comfort. The right accessories amplify your positioning work, turning minor adjustments into measurable improvements in both concealment and wearability. Holster wedges sit at the foundation of this approach because they cushion contact points and reshape how your gun sits against your body.
How Holster Wedges Transform Your Setup
Medical-grade foam acts as a cushion between the holster and your body, distributing pressure more evenly instead of concentrating force on a single point. A soft cover eliminates the skin irritation that rigid plastic wedges cause during eight-hour workdays. You position the wedge on the trouble zone identified during your Poke and Check method: grip side for printing issues, muzzle side for dig-in problems. Four sizes match everything from subcompact pistols to full-size setups, so you avoid forcing a one-size-fits-all solution onto your specific frame and firearm. Test placement by sliding the wedge along the holster’s back until printing disappears or pressure releases. This flexibility beats rigid wedges that lock you into a single position and force you to buy new hardware when your setup changes.
Your Belt Activates the Wing More Than You Think
Your belt matters far more than most carriers realize, and not for the reasons you’d expect. A belt that flexes and conforms to your body activates your holster’s wing or claw more effectively than a stiff, rigid gun belt. When belt pressure pushes the holster against your body, the wing converts that linear pressure into rotational force on the grip, pushing it inward. Test your current belt by tightening it fully and checking whether your holster’s wing rotates the grip inward. If the grip still prints, your belt either lacks enough tension or won’t flex enough to activate the wing properly.
Clothing Choices Shape Your Positioning Precision
Fitted shirts expose printing faster than loose cuts, which means your cant and ride height adjustments must be more precise. Looser clothing forgives slight positioning errors but requires higher cant angles to prevent the grip from standing away from your body. Improper ride height causes muzzle pressure while seated and poor grip access when standing, so select cant and ride height that work across all three positions rather than optimizing for a single scenario.
Test One Change at a Time
Adjust one variable at a time, carry for a full day, then evaluate before making the next change. This methodical approach prevents the endless holster-swapping cycle that wastes time and money. Small positioning tweaks become more effective when you add proper cushioning to your setup-a holster wedge amplifies these adjustments by cushioning contact points and smoothing the grip profile, making fine-tuning work without requiring new hardware.
Final Thoughts
AIWB positioning comfort tips work because they address root causes rather than symptoms. Cant and ride height form your foundation, the Poke and Check method reveals exactly where problems hide, and small adjustments compound into real improvements. Printing, dig-in, and accessibility issues interconnect, so fixing one often solves the others-and carriers who succeed stop chasing new holsters and start mastering their current setup through methodical positioning and the right accessories.
Your body, clothing, and lifestyle all influence what works for your appendix carry. A position that feels perfect standing might create pressure when you sit, and a cant angle that hides your grip in fitted fabric might print in looser clothing. This isn’t failure-it’s the normal process of finding your personal sweet spot. Test one change at a time, carry for a full day, then evaluate before making your next adjustment.
Start with your current holster and belt, then use the Poke and Check method to identify your specific trouble zone. Adjust cant or ride height based on what you find, and if positioning alone doesn’t solve the problem, add a holster wedge to cushion contact points and reshape how your gun sits against your body. Medical-grade foam with a soft cover amplifies your positioning work without requiring new hardware, and appendix carry becomes natural when your positioning is right and your accessories support that foundation.